Anet A8 3d Printer – my way to accurate prints
Sebastian Pohl - 1. September 2017I already planned to build a second 3d printer in addition to my Sintron Kossel a while ago. My initial plan was to go full DIY and use 2020 profiles and 3d printed parts. The problem with this approach is that my delta printer is not accurate enough and i wanted my second printer to be more accurate. But building it with non-exact elements would certainly not contribute to achiving this. So i was looking for a cheap kit that i could start with and improve on.
The whole plan was on hold for a long time until i stumbled upon the Anet A8 printer. It is a very cheap Prusa i3 clone and is available on ebay, gearbest and other websites. Usually the price ranges from 150 to 200 Euro including shipping. I found one offering for 130 Euro with free shipping from germany.
The A8 has a big community and there are a lot of guides and videos out there on how to build the kit. This is what you might end up with:
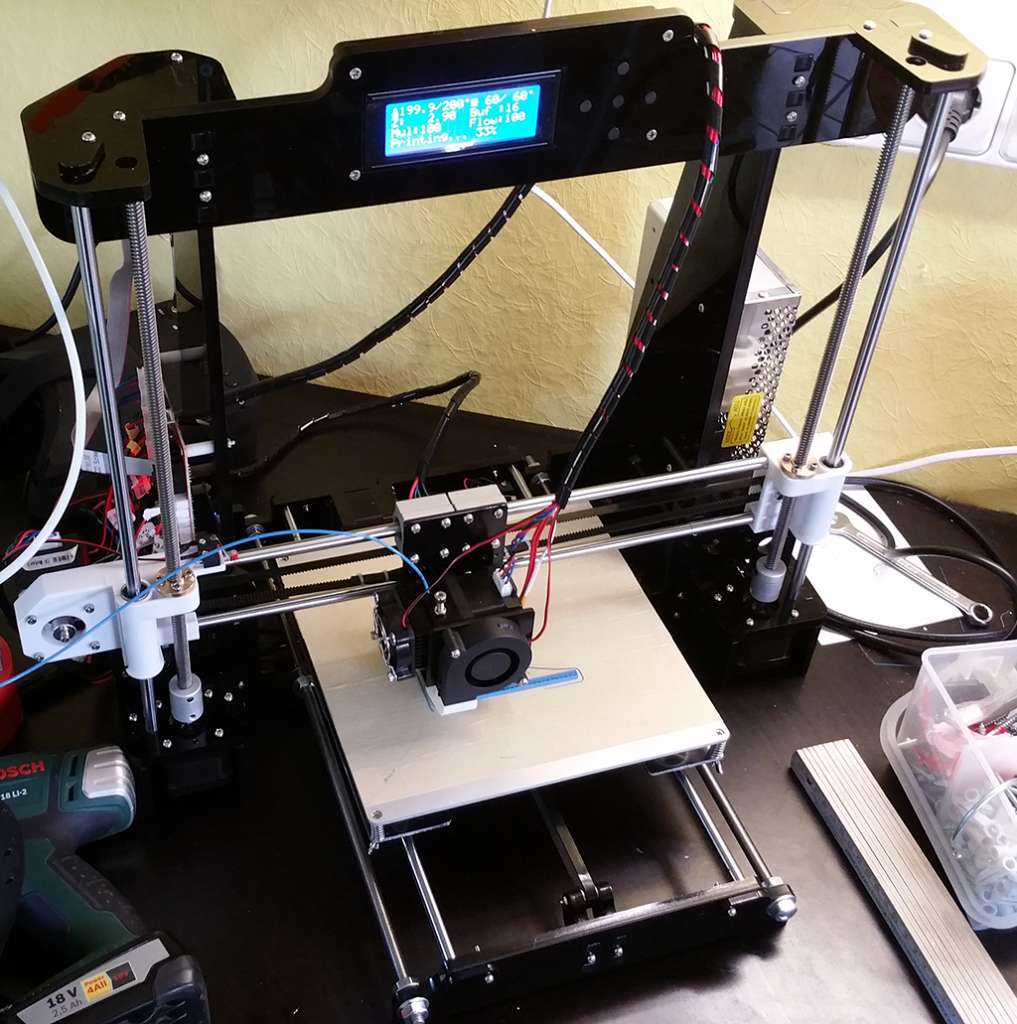
The frame feels sturdy with a little bit of flex in it. At first glance this looked like it would produce decent prints. But printing out a testpiece revealed that there was an error of about 1.3mm in X-direction for every 90mm in Y-direction.
It took me a while to figure out why this happened. The whole frame was skewed. Viewed from the top it looked something like this (The dotted red lines show where the frame should have been):
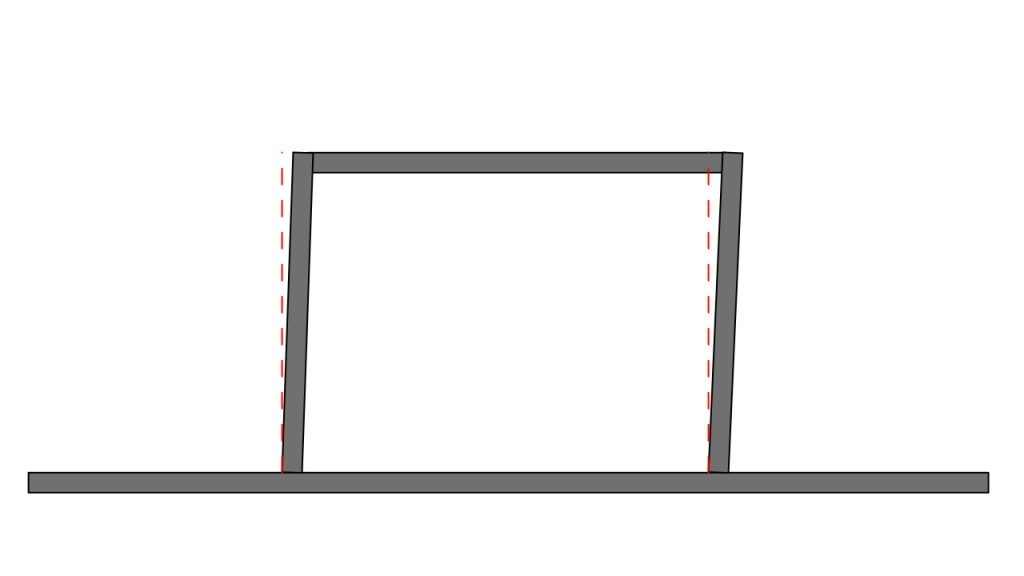
This meant that the Y-axis was slightly angled to the X-axis. My first thought was to correct this in software. There is a g-code for this, the M556 command is made to apply axis compensation. The problem is, that it is only implemented in the RepRap firmware right now. And i could not find a guide on how to get it on to the Anet V1 Board that is built into the printer. Instead i tried my luck with the Skynet firmware (a marlin fork that was made specifically for the A8) but i had a few issues with it (random reboots) and it did not have the M556 command included.
I then decided to fix the symptons and thought about how to fix the skewed frame. I came up with two options:
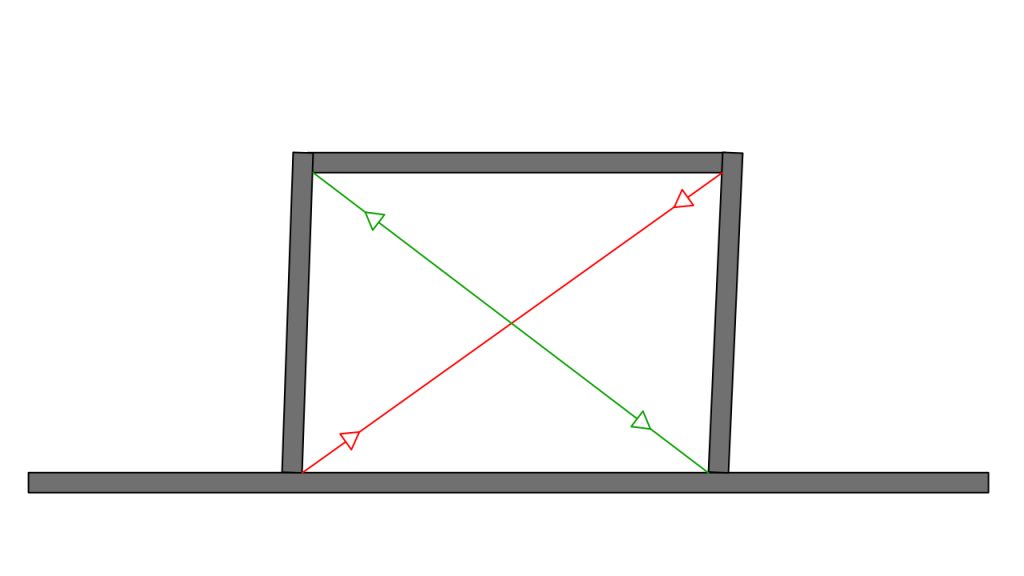
- Red Line: Apply tensile force to draw the opposing corners closer. This would straighten out the footprint.
- Green Line: Apply pressure to increase the distance of the corners. This should also straighten things out.
Because of the materials i had at hand i tried the first option first. I tried to use a very strong, non-stretching thread but the force needed was surprisingly high and would break the string.
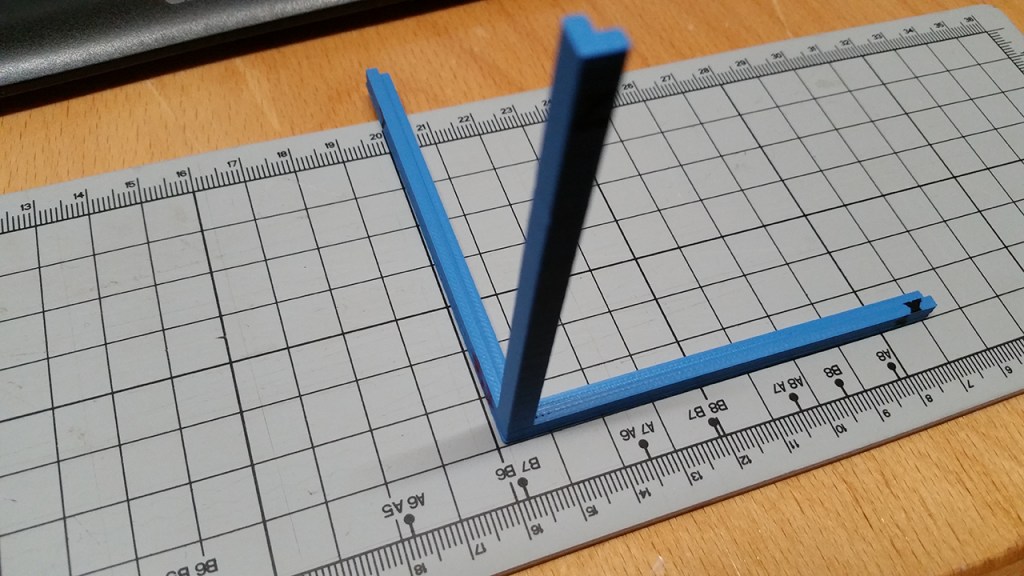
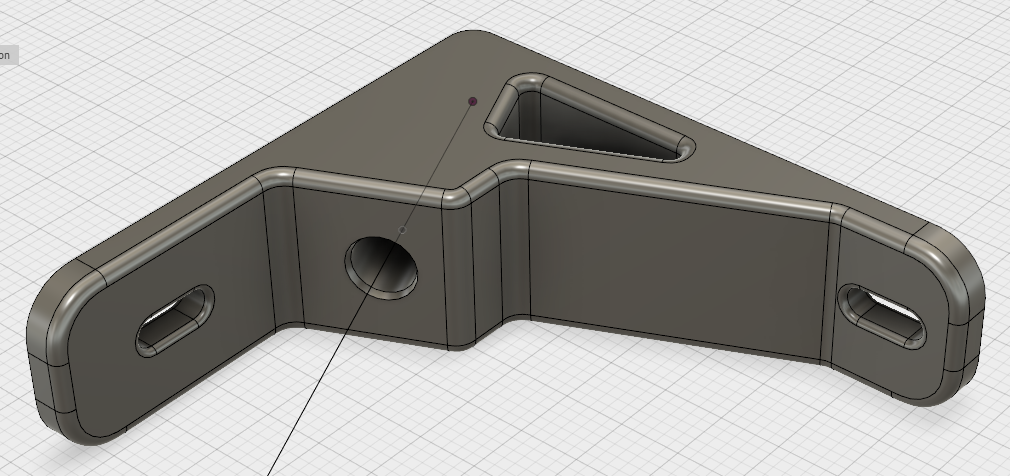
After purchasing some threaded rods i designed a corner piece that would take an m4 rod and could apply pressure by tightening nuts on each side.
At first it looked promising even with a very high force needed to straighten the frame. But after rechecking with another test-piece the axis were just a little bit better aligned. At this point i was ready to pack every thing up and just admit failure. I started taking out screws and noticed something.
I always thought that laser cut pieces have straight sides… But looking closer it is more like this:
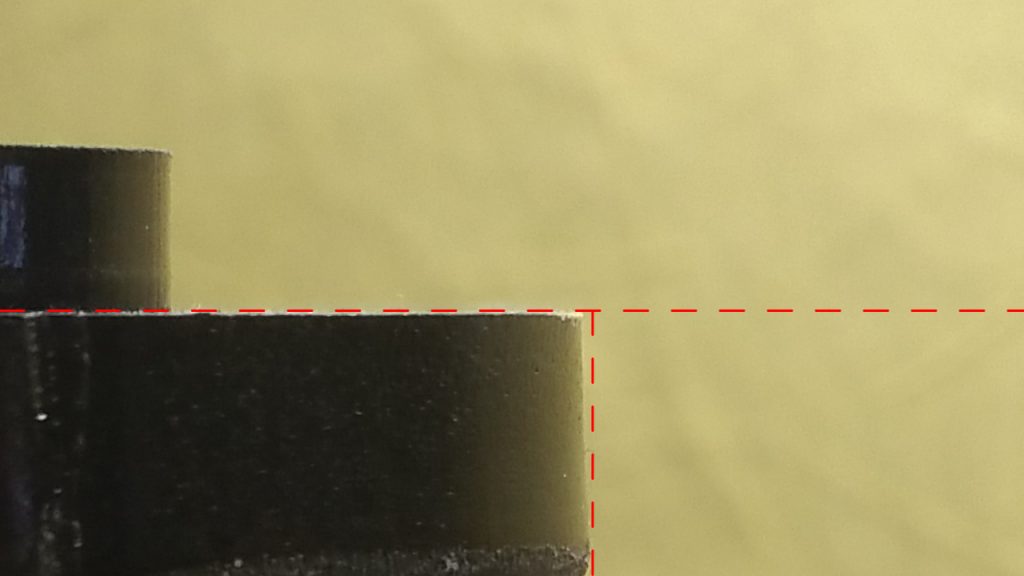
The red lines are just a visual guide to show that the sides are not straight but angled and even curved. Following this problem, as soon as i thightened the screws it just skewes the frame.
My solution:
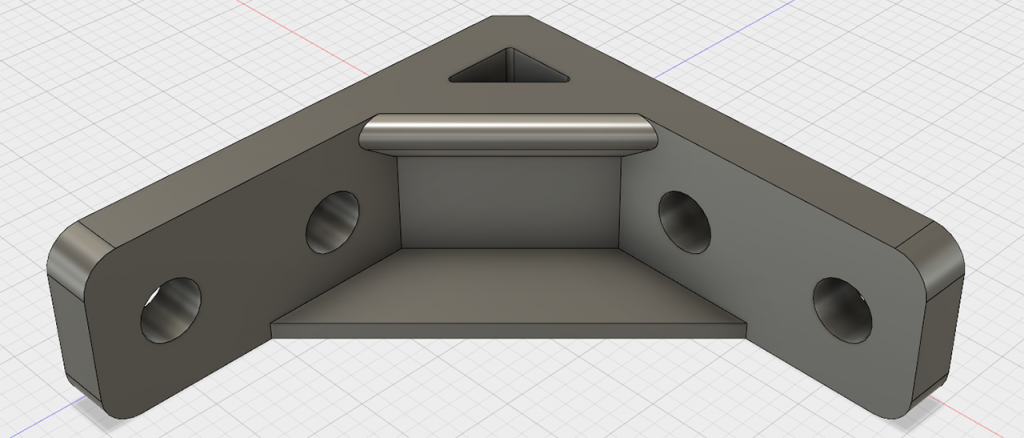
I designed and printed a few of these (12 in total) and instead of using the built in slots for the screws in the frame i bolted it together using these brackets. You can find this bracket on thingiverse here.
And it worked suprisingly well! The prints are now really straight.
With the skew-problem fixed i did a few other addons and fixes to make the printer more accurate, less loud and safer.
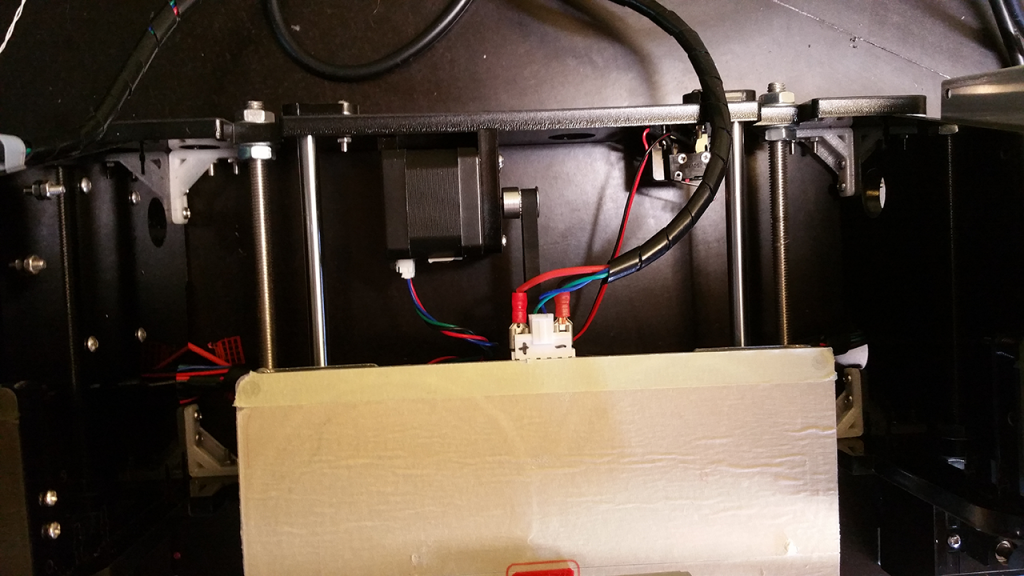
- I added a MOSFET for the heated bed and also replaced the plug on the heated bed with crimped connectors as you can see in the picture above. This should make a better connection and produce less heat. The MOSFET solution is more or less just a crutch solution because of the poor quality of the Anet Board. I am planning to replace the board with something better in the future.
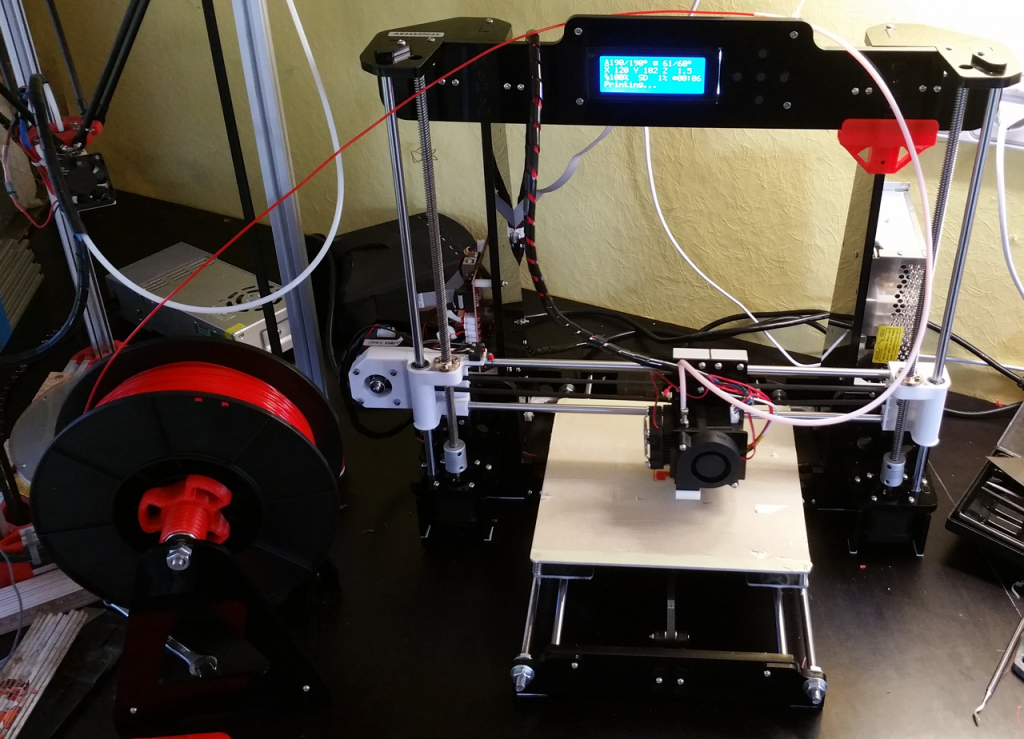
- Printed a spool holder so the spool would roll smoothly and not tuck on the extruder every now and then.
- Added a bowden tube that is fixed to the top frame and goes to the exturder to help relieve strain on the extruder.
- Replaced the LM8UU linear bearings on the bed with Igus bearings.(Not an affiliate link). Made the whole printer a lot quieter.
- Upgraded to the current Marlin release because the A8 was officially added to the supported printers.
In its current state it prints reliably and accurate but as always, a diy-printer is a work-in-progress…