Version Control in Unity3D with Perforce
Sebastian Pohl - 12. Mai 2016
We have been using Unity for a long time now and we have always been struggling with any type of version control / centralized storage for our projects. We tried different solutions like svn or git and always ran into troubles often sooner than later.
After licensing Unity Pro we planned to at least use the asset server to avoid having to sort trough tons of indiviual copies and „branches“ on multiple workstations. But unfortunately, when we finally found the spare time to set it up, the asset server was somehow marked as deprecated. But the accompanying documentation page recommended Plastic SCM or Perforce as alternate solutions.
Our decision to try out Perforce was based solely on the fact that i had heard more about Perforce than Plastic SCM.
Investigating what we needed to do, it sounded very promising:
- Perforce is free for small teams with up to 5 members (Yes, our team is that small…). This makes it easy to try out even for a longer period than the usual 30 day trials.
- It comes integrated into Unity Pro and for Unity Personal there is an official plugin, also free on the asset store. (Spoiler: The plugin did not work for us and we wanted to use it on our personal projects, too. So we did not use the pro integration either.)
- It is easy to set up.
I have to admit, the part of it being free for small teams was a huge plus.
Oh, and please be aware: I am not an expert on perforce!
Server side
Basically you have two options: Use a perforce cloud service or install it on your own server. We opted for the latter one.
Getting it running was actually impressively simple. Basically a production installation is the same as their „10 minute test drive“ installation. You can check it out here.
If you are doing a production installation, you might want to put in a little more thought about where and on which user you install perforce. Please avoid running it as root!
Condensed to the bare minimum these are the steps to get a Perforce Helix Server up and running in literally minutes:
- Decide which user will run the perforce server. Log on to your server as that user.
- Make a directory where perforce can live. It does not really matter where. Just pay attention to the disk space available, there should be plenty for your projects to come!
- Prepare the environment:
export PATH=/perforcePath:$PATH
export P4PORT=1666
This is the bash syntax to tell your server where it can find perforce and on which port it runs. Just replace perforcePath with the directory you used.
- Get the executables. On the download page, choose the right package for your distribution and architecture. Extract it to the directory you created.
- Modify the permissions so the files are executable and start the perforce server:
cd /perforcePath
chmod a+x
./p4d -d
- Enjoy.
Yes, this is a basic installation and it can be done in a few minutes. But i recommend you take a longer look at the documentation to see what they have to say about production installation.
The first thing to mention is: At this point, the perforce server is completely unprotected! Whoever connects to the server and tries to execute a command can do it and the first user to try might even become a perforce super user with the right to change the server settings. But do not be afraid, this can easily be changed.
Within your server package comes a little tool called p4 that will let you make changes to your server.
First thing:
./p4 protect
This will let you define a superuser for your perforce server. But still, everyone who gets in contact with the server will get an autocreated useraccount. This can be fixed very easy, too (Remeber to do it with the user you assigned the superuser role!).
./p4 configure set dm.user.noautocreate=2
This restricts the creation of new users to the superuser! And yet, every user that was created before this can still use the server without providing a password. Let’s fix that,too:
./p4 configure set security=2
Now every user has to use a strong password. Please read up on the values used here.
You can do a lot more than this basic configuration, theres a lot of documentation on perforce server configuration (Here is a handy guide). But as a basic setup, this is already usable.
Client side
As we are at the moment only using windows workstations, i will only be able to cover how it works on this operating system.
You start with downloading the Helix P4V visual client from the download page and installing it. When it is done, you can start the P4V application and it greets you with a small window to set up your connection.
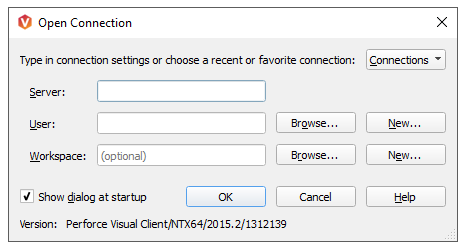
Just enter your server adress followed by the port like server.tlf:1666 and your username. You can leave the Workspace field empty. Click ok to start the tool and after inputting your password, you can start using it.
Please keep in mind that this is a very powerful program and i am only scratching on the surface to give a quick introduction on how to get your unity projects to work with it.
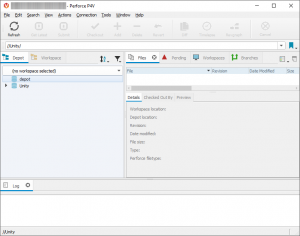
To start the process you first need a workspace, that is a kind of container where your projects live. Just click on the dropdown that currently says (no workspace selected) and choose New Workspace… You can then give the workspace a name and a directory on your harddisk.
Now you are ready to add your unity project to the workspace.
Adding a unity project
At this point you are probably asking yourself what has happened to the unity plugin i was talking about? Well, i will keep it short: It did not work for us. It kept throwing errors left and right and kept messing up our test projects. So we decided to ditch it and only use the P4V visual tool. Again, with more knowledge about perforce you will definitely be able to use it. Let’s get back to the howto!
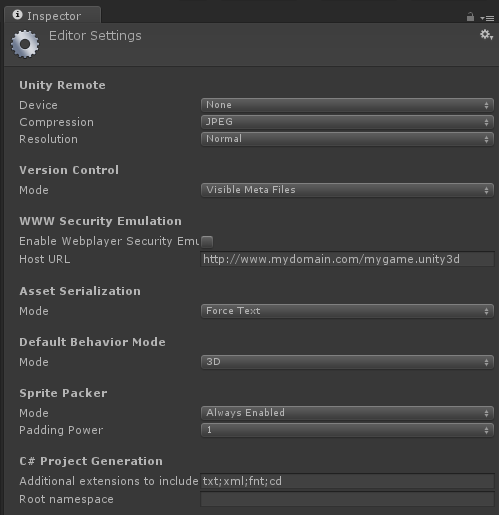
Grab your project folder and move or copy it to the directory where your workspace is. Then open it and go to Edit > Project Settings > Editor and change the settings for Version Control Mode and Asset Serialization Mode:
The Version Control Mode is very important, if you do not set this, you will run into problems really fast because unity is very unhappy if you mess with its meta files. By setting them to visible you make it easier for perforce to synchronize them.
The second setting, Asset Serialization, is optional. If you set it to Force Text the version control has an easier job to tell the differences between file versions. Binary files are just not that easy to compare.
Now you can close unity. There is still one thing to do before you can tell perforce to grab your files. Unity uses a lot of files that mess up version control and your project if you try to synchronize them. We will use an ignore list to tell perforce to skip those files and directories. Just create a .p4ignore file in the root of your workspace with this content:
#directories
Library
Temp
obj
Deploy
This file tells perforce to ignore the directories that are listed. Library and Temp are dynamically created and populated by Unity itself. Sometimes you get an obj directory. It is safe to ignore all of those. The Deploy directory is something specific to our projects, it is where we keep our builds. We dont need to sync those, so we ignore the directory, too.
To really use this ignore file we have to tell perforce how our ignore file looks. On windows you get the p4 command line utility in your perforce directory. Just open a command line and run this:
p4 set P4IGNORE=.p4ignore
You might have to navigate to your perforce directory and directly call p4.exe.
Now everything is prepared for the big step, adding your files to the repository. Just go back to your P4V tool, open the workspaces tab and click on the Refresh button. You should now see your Unity project folder. Right click on it and choose „Mark for add“. In the following window leave the default changelist choosen and click OK.

Perforce will no go trough your directories and mark all the files. You will see something like this:
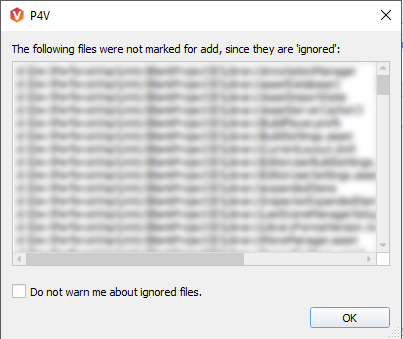
This is perfectly fine, it is just telling you that it ignored a lot of files as we have told it.
At this point nothing much has really happened. The files are just marked. The last step is to click on Submit to get the submit formular:
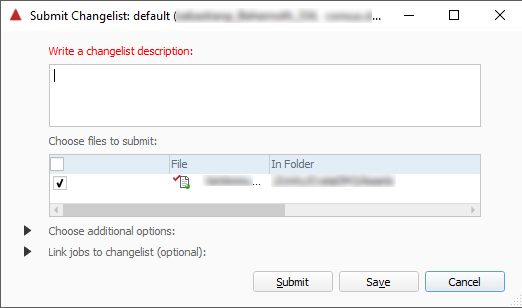
Enter a description on what you are submitting and hit Submit.
That’s it, your files are now on their way to the perforce server.
Check the project out on another machine
The process of checking out a project on another maching is very simple.
Including the process of creating a workspace it is the same as described above. Then the user can use the depot view in the P4V tool to see what is on the server and right click on a project directory to use. Choose „Map to Workspace“ enter your workspace information and hit OK. You will then be prompted if you want to check out the latest revision. Just confirm and the files will be downloaded to the machine.
You can now open the project in unity and it will create the folders that were ignored by our ignore list on the other machine.
And don’t forget to create an ignore list on the new machine, too! Otherwise you might end up with a lot of files you should better not have synched.
Conclusion
Perforce is suprisingly easy to set up and use. You need to know a few tricks to get unity to behave well with software versioning tools but once it is set up, it just works.
You might wonder why there are no further explanations on how to use perforce in a day to day routine. This is because it is still a complex matter and you better read the documentation and spend a few days learning what the commands do (That is exactly what i am doing right now. Did i mention i am no expert on perforce?). You can start here or here or anywhere on the pages that were linked above.
If you are trying this, please let me know in the comments if it worked for you and/or what your problems and solutions were!
Amazing tutorial, thanks for this! Somehow this information is very hard to find. I used an updated ignorelist from this link: https://github.com/github/gitignore/blob/master/Unity.gitignore
you need to remove the []s and \s and this will also ignore package files etc…
Hi,
the information from this tutorial is mostly obsolete by now. Unity usually is set up to be put into version control from the very start nowadays. We switched to .git a long time ago and had no problems ever since. The gitignore you linked is a very good resource to get a clean repository.
Hi there! Are you still using Perforce? Or did you find a new tool better for this?
Thanks for the detailed explanation!
Hi!
No, we are no longer using Perforce. It was a good solution at the time but as unity progressed trough the versions it got to more of an out of the box solution if you just use git. Just use a good gitignore file like this one for example: https://github.com/github/gitignore/blob/master/Unity.gitignore.
Is it okay if we feature your site in our next email newsletter? It’s a perfect fit for a piece we’re doing and I think our audience would find some of the content on your site super useful.
I know you’re probably busy, so just a simple yes or no would suffice.
Many Thanks,
Hello!
You should not use the information in this article, they are really outdated. If you would like to have information on how to do versioning unity projects, just send me an email to the address un the imprint.
I just wanted to followup on the request I submitted through your contact form a couple weeks ago as I haven’t heard anything back. I pasted it below for your reference.
Is it okay if we feature your site in our next email newsletter? It’s a perfect fit for a piece we’re doing and I think our audience would find some of the content on your site super useful.
I know you’re probably busy, so just a simple yes or no would suffice.
Many Thanks,
Hi,
please read my answer i wrote to your last request.
In short: The information in this article is outdated, do not use it. If you are interested in an updated version, please send me an email!